Introduction to Gutters and Downspouts
A house is like a living, breathing organism, and every piece of it plays an integral part in its overall health. Just like veins in our body transport blood, gutters and downspouts in a house are essential in channeling rainwater away from the structure, thereby preventing potential water damage. Among these components, the seemingly insignificant gutter elbow holds substantial importance. Acting as the bridge between the gutter and downspout, it ensures a seamless flow of water. However, a question that homeowners often grapple with is - how to attach a gutter elbow to a downspout? So, let's dive in and explore!
The Role of Gutter Elbows

Imagine the chaos if the veins in your body took a wrong turn or had a blockage. Similarly, in a rainwater disposal system, gutter elbows are the critical curves or bends that ensure a smooth transition of water from the horizontal gutters to the vertical downspouts. Without them, water would indiscriminately splash off the end of the gutter, thus leading to potential soil erosion, damage to the landscape, or worse, your home's foundation. You might think of attaching this small piece as an intimidating task, but trust me, it's easier than assembling a jigsaw puzzle!
Tools Required for the Job
Wouldn't it be weird if a surgeon showed up without their medical instruments for surgery? Similarly, for our gutter surgery, we need an arsenal of the right tools.
For this job, you'll need:
- Gutter Elbow
- Downspout
- Screws or Rivets
- Drill
- Measuring tape
- Pencil
- Ladder
Each tool has a distinct role - the drill and screws or rivets are for securing the elbow, the measuring tape and pencil are for accurate placement, and the ladder is for reaching the gutter.
Safety Precautions Before Starting
Let's talk safety now! Just as a knight wouldn't go into battle without their armor, you shouldn't start a home improvement task without adequate safety measures.
Safety Gear
Armor up with safety glasses to protect your eyes from debris, gloves to guard your hands, and sturdy, slip-resistant footwear for a firm grip while climbing the ladder. Your safety isn't just a priority, it's THE priority!
Handling Tools Safely
Using tools can be as risky as walking on a tightrope if you don't handle them with care. Maintain a clean workspace to avoid any trips or falls. Remember, it's not a race against time, so take it slow and steady.
Choosing the Right Gutter Elbow
Now comes the time to choose your knight in shining armor - the right gutter elbow. The choices in types and materials are like a vast sea, and your selection can impact the longevity and efficiency of your drainage system.
Types of Elbows
There are two main warriors on this battlefield: A-style elbows (with two bends at 72 degrees) and B-style elbows (with one bend at 72 degrees). Your home's architecture, gutter system, and your aesthetic preference will guide your choice.
Material Considerations
Like the variety in a painter's palette, gutter elbows come in several materials like aluminum, copper, vinyl, and steel. While making a choice, take into account factors like your local climate, budget, and the style of your house.
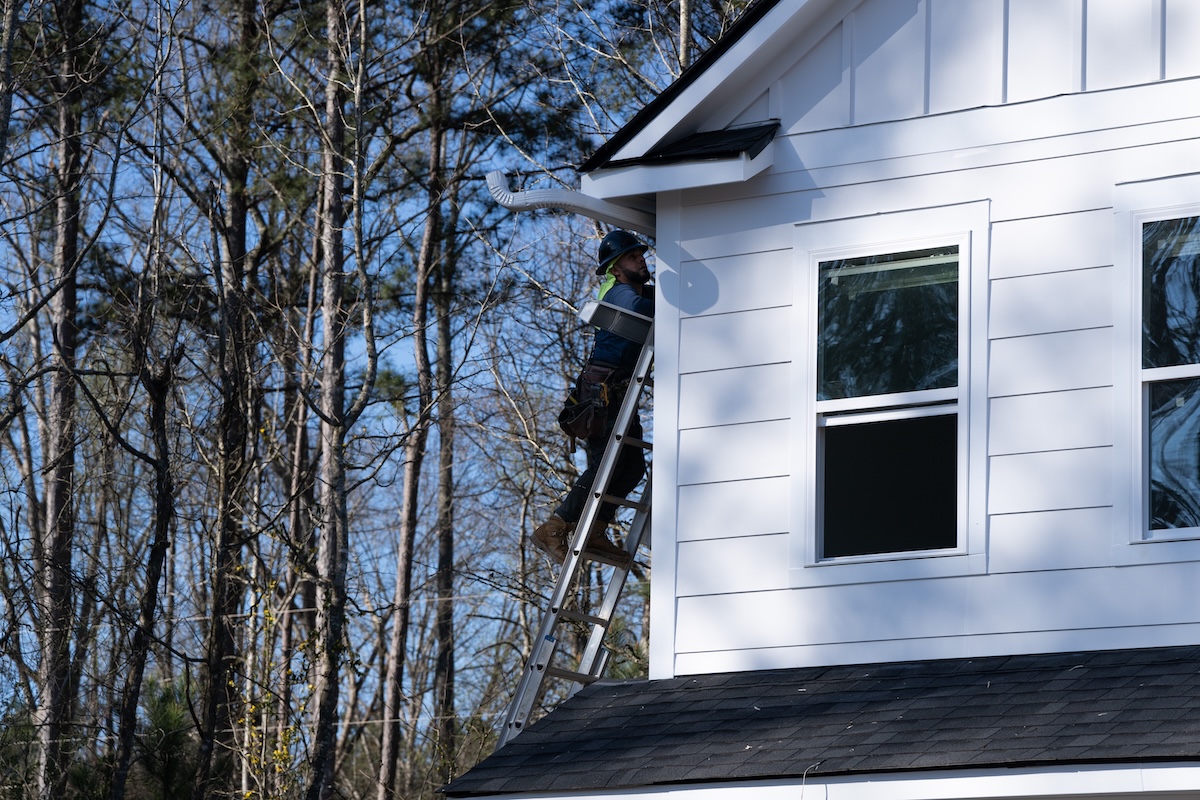
Steps to Attach Gutter Elbow to Downspout
After arming ourselves with the right elbow and safety measures, let's venture into the process of attaching the gutter elbow to the downspout.
Preparing the Surface
Preparation is like laying the groundwork before building a castle. First, using the ladder, ascend safely to the gutter's height. Clean the end of the gutter and downspout from any debris or dirt. If your gutter and downspout are old, you might want to roughen the surfaces with sandpaper for better adhesion. Mark the attachment points using a pencil.
Fixing the Gutter Elbow
Now it's time to fix the elbow. Hold it against the gutter's end at the marked point and drill holes through both. Now secure it using screws or rivets.
Connecting Elbow to Downspout
The final step is to connect the elbow to the downspout. Align the free end of the elbow with the top of the downspout and repeat the drilling and fixing process. Voila! You have successfully attached a gutter elbow to a downspout.
Troubleshooting Common Issues
Every hero encounters problems, and so might you. But remember, every problem has a solution. Leaky joints? Seal them with a high-quality sealant. Elbow or downspout doesn't fit? You might need a crimping tool to adjust the size.
Maintenance Tips for Longevity

To ensure that your drainage system lives a long life, regular maintenance is key. Clean the gutters and downspout regularly, check for any leaks, and if you live in a cold climate, consider installing heat tapes to prevent freezing.
Conclusion
And there we have it! Attaching a gutter elbow to a downspout isn't rocket science; it's a simple task when you have the right tools and knowledge. So the next time it rains, you can sit back, enjoy the patter, knowing that your home is well-protected.
Frequently Asked Questions
What material is best for gutter elbows?
The "best" material depends on various factors such as your local climate, budget, and home style. Aluminum is the most common due to its affordability and resistance to rust.
Can I attach a gutter elbow myself or do I need professional help?
With the right tools and safety measures, attaching a gutter elbow is a fairly simple DIY task. However, if you're uncomfortable doing it yourself, it's always best to hire a professional.
How often should I clean my gutters and downspouts?
It's recommended to clean your gutters and downspouts at least twice a year - once in late spring and once during early fall. If you have a lot of trees near your house, you might need to do it more frequently.
Why is my gutter elbow leaking?
Leaks can be due to improper installation or wear and tear over time. You can usually fix it using a good quality sealant.
Can I replace a gutter elbow without replacing the whole downspout?
Yes, if only the elbow is damaged, there's no need to replace the whole downspout. You can simply replace the elbow.
.jpg)
